


Best Methods To Export Exchange Mailboxes Based On Date Filters
5 Mins Read
Published on: 12 November 2025
Last Updated on: 27 November 2025

It is often required to export mailboxes to PST files for backup, archiving, or other reasons. Sometimes, exporting all the mailbox data to PST doesn’t seem meaningful or even required. You are only required to export the mailboxes’ data for a particular time period.
In this article, we will be discussing different methods to export Exchange mailboxes to PST based on the date filters. We will also mention an EDB to PST converter tool that can help granularly export mailbox data to PST.
Why You Need To Export Mailboxes Based On Date Filters?
There could be a number of reasons to export mailbox items greater or lower than a particular date or based on a date range. Some common ones are:
- Cleaning up the data due to regulations or other compliance requirements.
- Migration has a cut-off date due to the size of mailboxes.
- Migration has phases where emails are to be migrated from the last year, and older emails are to be migrated at a later stage.
- Reducing the size of the mailbox and archiving emails from a certain time period.
Methods To Export Exchange Mailboxes Based On Date Filters
To export mailboxes to PST based on date filters, you can follow the methods mentioned below.
Method 1: Using Microsoft Outlook
With Microsoft Outlook, you can export the mailbox data to PST using some filtering options. For this method, you will need a profile with full access to the mailbox. Follow the instructions below to export the mailbox data using Outlook:
- Open Microsoft Outlook.
- Click on File and click on Open & Export.
- Click on Import/Export.
- Select Export to a file.
- Select what you want to export and click on the Filter button.
- Click on the Advanced tab.
- In the Define more criteria, click on Field.
- Click on Date/Time Fields and click on Received or Sent.
- Set the condition.
- Select the location of the PST file.
This will export the items to PST that have been received after the specified date. If you wish to have all in one PST file, you can add more criteria to the list.
Considerations when using this Method
By using Microsoft Outlook, you can easily export a mailbox to PST with a few criteria. You can also export user mailboxes, shared mailboxes, user archives, and public folders. This method is ideal when it comes to exporting small mailboxes. However, when you need to export large mailboxes, there might be some issues you can face, such as.
- The PST file can get corrupted.
- If the mailbox is larger than 50 GB, it will exceed the PST file-size limit.
- Outlook may crash while exporting a large mailbox.
- There is no progress or continuation in case there is an interruption.
- Cannot be used for exporting multiple mailboxes at once.
Method 2: Using PowerShell Commands
Using the PowerShell commands in the Exchange Management Shell (EMS), the process can be done directly from the server. There is no need to have a profile configured.
When using the PowerShell commands to export the mailboxes, you need to fulfill some prerequisites. The user account you’ll be using for exporting the mailboxes must have the right server permissions in the Exchange Server. Follow the command below.
New-RoleGroup -Name “Import-Export” -Roles “Mailbox Import Export” -Members <user email address>
This will give the right permissions needed to export. The other prerequisite is to create a file share as the export destination. The file share must be shared with full permissions with the user and the Exchange Server Subsystem security group. Once this is done, you can use the New-MailboxExportRequest command to export the specified mailbox to the destination, with all the emails that have their timestamp before (lt) or after (gt) the specified date.
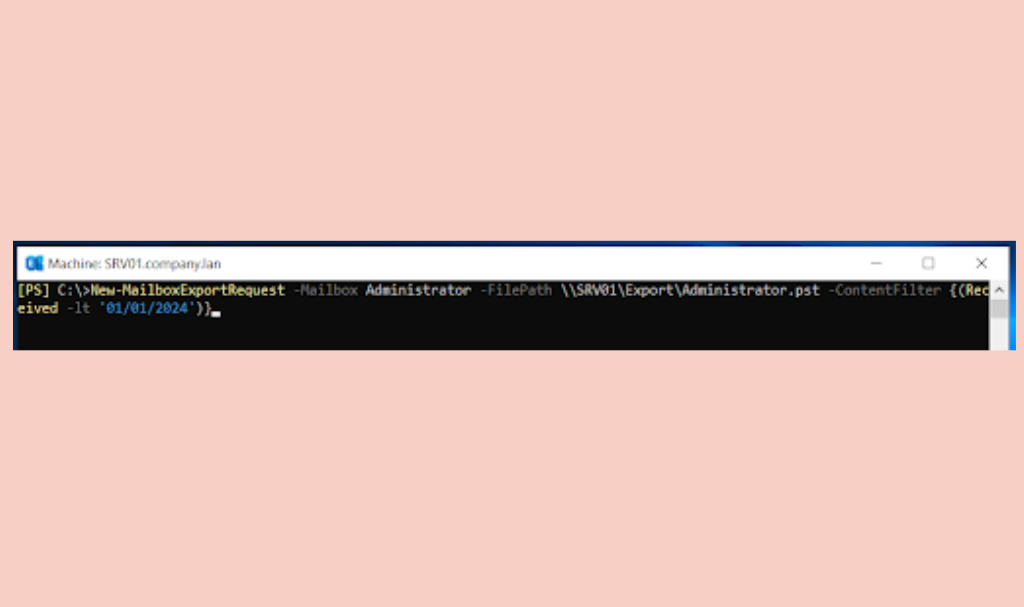
You can use the command below to export the emails that were received before 01/01/2024.
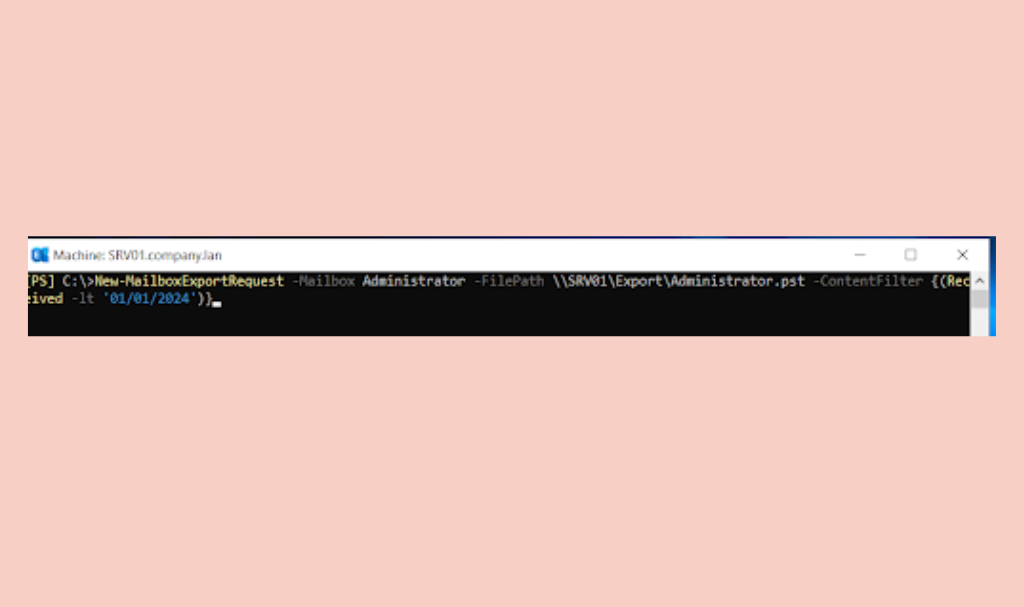
New-MailboxExportRequest -ContentFilter {(Received -lt ‘<01/01/2024>’)} -Mailbox <user to export> -Filepath <network path destination>
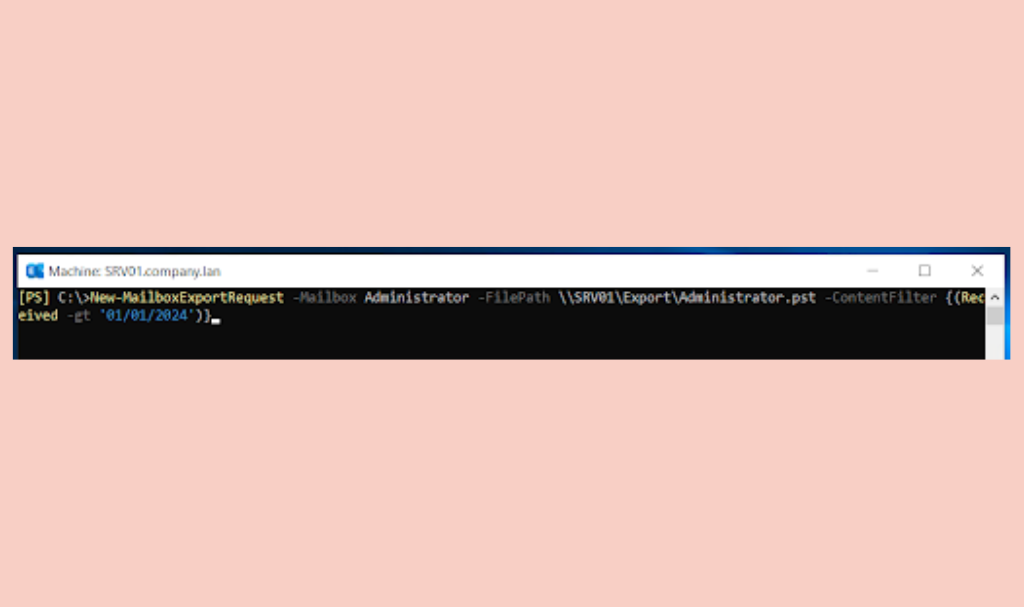
You can use the command below to export all the emails that were received after 01/01/2024.
New-MailboxExportRequest -ContentFilter {(Received -gt ‘<01/01/2024>’)} -Mailbox <user to export> -Filepath <network path destination>
If you combine both commands with the ContentFilter, you can export based on a date range (see the example below).
New-MailboxExportRequest -ContentFilter {(Received -gt ‘<01/01/2024>’) – (Received -lt ‘<07/07/2024>’) } -Mailbox <user to export> -Filepath <network path destination>
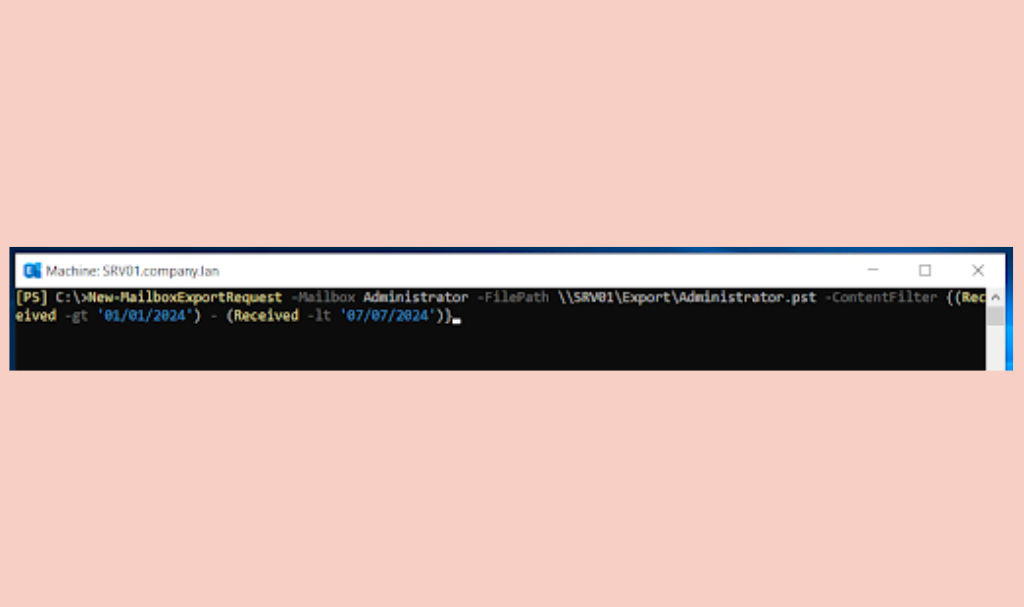
The above command will export all the emails received between 01/01/2024 and 07/07/2024.
Considerations when using this Method
With this method, you will have more flexibility to export a single mailbox with a date range/filter. To automate the process and export multiple mailboxes at once, you can also execute this command with a loop. However, there are some issues or limitations, such as:
- Scripting skills needed.
- Cannot export from an offline database.
- Can only export user mailboxes, shared mailboxes, and user archives.
- Cannot export any purged or deleted items.
Method 3: Using A Specialized EDB To PST Converter Tool
Specialized third-party EDB to PST converter tools have been on the market for quite some time. Stellar Converter for EDB is one such tool that stands out for its efficiency, accuracy, and user-friendliness. This tool can handle an unlimited number of databases with no limit on size or version of the Exchange Server.
Once the tool is installed, you can connect to an offline or online database. After a quick scan, the entire structure of the database is shown. You can then granularly export to PST using date and other filters.
The process is quite simple and compatible with every Exchange Server available. The installation takes only a few minutes, and the tool can be used to export user mailboxes, user archives, shared mailboxes, and public folders.
Considerations when using this Method
The tool is relatively small, but very powerful. It allows you to export all the resources of the Exchange Server database with a simple interface and in a few clicks. It can export the data to PST and other file formats. You can also export directly to an Exchange Server or Office 365 account with automatic mailbox matching, priority export, and parallel exports. Since it’s a third-party tool, you need to purchase the license.
Conclusion
In this article, we have explored the possible ways to export Exchange mailboxes to PST with a date filter. However, it seems that all the native methods involve some kind of manual intervention, require scripting skills, and have some limitations when it comes to reliability or size. When it comes to exporting for migration or archive, you must ensure that all the data will be exported with complete integrity. The third-party EDB to PST converter tools, such as Stellar Converter for EDB, tick all the boxes when it comes to exporting and migrating data from an Exchange Server database.


Related Articles


Comments Are Closed For This Article